10/26/11

Inside Apple iTunes, Sharing music on your home network


I've been trying (and still am) to figure out the best way to manage and share a large library of .mp3 files, I never cared much for iTunes but considering I have iPhone/iPads I thought I should at least look into it.

The sharing features of iTunes leave much to be desired but I am going to attempt to configure it so that I have an iTunes server with a library that can be shared throughout my network.

What I decided to do was to install iTunes on a virtual machine running in my VMWare ESXi environment, this way I could add iTunes into the startup folder and it would always be open and available. One of the things I don't like about iTunes is that to share a library iTunes has to be open and if you setup sharing and want to add or edit music or playlists, you have to do it from one computer.

So I wanted to come up with a way where any one of the computers could add or edit music or playlists and it would propagate to all the other iTunes computers in the house.

First on the iTunes server I pointed the media folder to my network share that contains all of my .mp3 files, I also checked the copy files to iTunes Media folder when adding to library checkbox. This way any new music added to the library will be copied into a central location.


Import Music

To import my music I selected File - Add Folder and proceeded to browse to my mapped drive where all my .mp3 files are located. Note this can be a very slow process if you have several GB of music.


Once all the music has been added to the library, I'm ready to look at how iTunes keeps track of the library and what files are important to know about.

iTunes Library Files - Library.itl and Library.xml


The iTunes library is a database iTunes uses to organize your music. Two iTunes library files are created and maintained by iTunes for different purposes. They're both in the iTunes folder.

Location of the iTunes library files:


Mac OS X:
/Users/username/Music/iTunes/iTunes Library.itl
/Users/username/Music/iTunes/iTunes Library.xml


Windows XP
\Documents and Settings\username\My Documents\My Music\iTunes\iTunes Library.itl 
\Documents and Settings\username\My Documents\My Music\iTunes\iTunes Library.xml


Windows Vista
\Users\username\Music\iTunes\iTunes Library.itl 
\Users\username\Music\iTunes\iTunes Library.xml


Windows 7
\Users\username\My Music\iTunes\iTunes Library.itl
\Users\username\My Music\iTunes\iTunes Library.xml


About the iTunes Library.itl file
This file is a database of the songs in your library and the playlists you've created. Some song-specific data is saved in this file. If you delete the file, iTunes creates a new, empty copy when you open the application, but any playlists, song ratings, comments, or other information you created is lost. The iTunes Library file is only used by iTunes, and is the only one backed up by Time Machine on OS X.


About the iTunes Library.xml file
This file contains some (but not all) of the same information stored in the iTunes Library file. The purpose of the iTunes Library.xml file is to make your music and playlists available to other applications on your computer. In Mac OS X other iLife applications (like iPhoto, iDVD, and iMovie) use this file to make it easier for you to add music from your iTunes library to your projects.


The point of this tutorial is to let several computers share the same iTunes library so after all of my music has been successfully added to my iTunes server I need to share the library files on the server. On the iTunes server, I navigated to the folder containing the iTunes library metadata. By default (see locations above) you can typically find this in \Users\username\My Music\iTunes. I see a file called iTunes Library.itl so I know I'm in the right location. I need to share this folder on the network, so I right-click the iTunes folder, select Sharing and security and select Share. Now I add the users that I would like to give share access and select the share button.


Grant permissions to all user accounts that will need access to the iTunes library


Next I connected all of my networked computers to the iTunes share, I mapped a drive on each. To do this, access a networked Windows computer, right-click on My Computer, and select "Map network drive" Choose a drive letter, then I browse to the share I created on the iTunes server. When I'm done, I click Finish. 


Now on all of my networked computers, I launch iTunes while holding the Shift key. This let me change the default iTunes library. I Clicked on Choose library, then navigated to the mapped drive (W:) that I just created. Select the iTunes Library.itl file and I'm done.


This completes the shared iTunes library, I'll continue to test how this works and if I find any improvements I'll update the post.


10/24/11

Synology Disk Station DS1010+ vs IOMEGA StorCenter IX4-200D

Disk Station DS1010+


Pros 
  • Award winning management interface
  • Flexible RAID volume formats (SHA, RAID+)
  • Performance
  • Dual GB Nics
  • VMWare Certified
  • iSCSI, NFS support
  • Expandability
  • Synology support
  • IPV6 Support
  • iPhone/iPad Apps
  • Link Aggregation for better performance
  • Memory : DDR2 1 GB (Expandable, up to 3GB)
Cons
  • Price
  • Power consumption (68 watt avg)
  • No integrated Synology Cloud functionality


I've been researching home/small business NAS units lately, and I can't seem to find a better bang for the buck than the Synology Disk Station DS1010+, they actually call this the DS1511+ now.

One thing that stands out on the Synology is the Disk Station Manager software which is currently at version 3.2 (only about a month old) and they have had an incredible number of revisions over the last several years.

Unique to Synology is the proprietary Hybrid RAID (SHR) which allows different physical disk sizes in the RAID volume to be combined and without losing any drive space. The SHR also allows for excellent RAID volume creation time, 8TB volume can take as little as 30 mins.


The DS1010+ is one of the top rated NAS devices in most performance comparisons that I've seen, I recommend searching for some benchmark comparisons like the one shown here.


Pros 
  • Dual GB Nics
  • VMWare Certified
  • iSCSI, NFS support
  • Cost
  • Low power consumption avg 30 watts
Cons
  • Iomega abandoned for other models
  • Performance
  • Dated interface
  • Unit reconstructs and verfies RAID array to often
  • No 3TB support
  • No Cloud functionality
  • No IPV6 Support
  • No iPhone/iPad Apps
  • Cannot expand memory (only 512mb)

I've blogged about the Iomega Storcenter IX4-200D NAS units that I have in my Lab, at the time of purchase I thought they were the best bang for the buck. The Iomegas have served me well and have handled all of the different network and storage configurations I have thrown at them but I honestly don't trust them.

More than once on both units I have had the NAS start rebuilding the RAID 5 array for no apparent reason, sometimes after heavy use and sometimes after what seems like little or no use. The unit will sometime rebuild and sometimes say verifying the RAID array. The rebuild process can take around 40 hours to complete with 4 2TB Seagate Barracuda Low Power 5900RPM drives. The verification can take about 12 hours with no degraded performance during the process. When the RAID array is being reconstructed the performance is horrible during the entire 40 hour process, it's so slow that the VCenter service will not start (probably due to timeout) which causes a lot of headaches.


During one month I had the RAID array rebuild 3 times and finally on the third time it reported that a drive had failed and it could not rebuild. This made me think that this had been the problem all along, a drive was failing and causing the inconsistencies. I replaced the drive (I always have a spare on hand) and the NAS reconstructed the RAID array. A few weeks later the NAS started reverifying the array, I haven't had it rebuild since the drive replacement but I'm worried about all of this activity. A couple weeks later I get the other Iomega NAS reconstructing the RAID array.

Two of my co-workers have the same Iomega IX4-200D NAS and have reported the exact same behavior with their units. I often wonder if it is a result of the drives that are in the unit (the Seagate LP Barracudas) or some incompatibility with VMWare ESX(i). We are all using our NAS devices in a similar fashion.

The deal breaker for me with the Iomega NAS has been Iomega themselves, Iomega seems to have completely abandoned their customers who purchased these devices. Shortly after the IX4-200D released, Iomega released the IX4-200D Cloud Edition, to my surprise they didn't offer any of the new features to the original IX4-200d NAS owners. Since Iomega released the IX4-200d, they have only released four small updates to the management software and the last one was about a year ago. The Cloud edition received a brand new shiny interface and integrated cloud functionality on what appears to be the exact same hardware (same processor speed, ram amount) it also added support for 3TB drives. At a minimum I would expect Iomega to add the 3TB drive support to all of its products.

Since the Cloud edition was released Iomega has released an entire new line of home/small business NAS devices  - the px series.

Overall I am very dissatisfied with Iomega, I will not buy another Iomega product unless Iomega does something significant to improve upon this disaster they have created. I would not recommend Iomega devices to anyone who is looking for a company to stand behind and support the products they sell.

10/23/11

Backup your VMWare ESX(i) Virtual Machines with Veeam for free! (VCPs)


I have been seeing posts about Veeam in blog sites and tech articles lately which peaked my interest to look into the Veeam line of products. I asked a co-worker about Veeam and he informed me that Veeam is currently free for all VMWare Certified Professionals (VCP).

From the following link you can register and download the software and license keys for both Veam Backup and Replication as well as Veeam Backup Enterprise Manager.

http://www.veeam.com/nfr/free-nfr-license

I installed Veeam Backup and Replication in a Windows Server 2008R2 virtual machine, and proceeded to configure some backups jobs. If you want to install Veeam Backup Enterprise Manager - IIS  must be installed on the machine prior to installation, including IIS 6 compatibility and Windows Integrated Authentication.

For the purposes of this demonstration I selected Add Server and pointed to a single ESXi Host

Enter the Host Name or IP Address followed by the login information


After the host is connected, the Datastores connected to the host will be displayed beneath the Host Name


Once an ESX(i) host has been connected, a backup job can be configured. Start by selecting Backup from the top navigation


Enter a name for the new backup job


Select a Processing Mode, for this demonstration I have selected Network


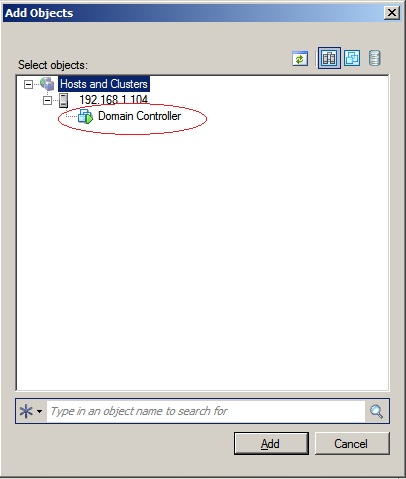
Select the Virtual Machine(s) that will be included in the backup job


Browse for Virtual Machines


The size of the Virtual Machine(s) will be displayed


From this step hard drives and templates can be excluded from the backup job. Select Exclusions


Select the Disks Tab and the Virtual Machine and Choose Edit


All Disks can be included or individual disks can be chosen, if individual disks are required, select the Selected Disks radio button followed by the virtual disks you want to exclude and select OK.


Enter the Backup Destination settings


Enter Guest Processing, if there are applications on the guest that could possibly need to be gracefully closed during the backup, select Enable application-aware image processing and enter the guest credentials with permissions to the machine


The job can be scheduled or ran manually


This completes the configuration of the domain controller backup job

10/18/11

Apple TV Generation 2 - Windows Jailbreak and XBMC Install

Ok, I know this one is way off topic but I thought I would share it anyway, I picked up an Apple TV Gen 2 yesterday. After doing some research and talking with a friend that had already jail broken a few of them, I planned on jail breaking it.

Note: All links to software utilities are listed at the end of this post
Software needed for this guide....
  • Greenpois0n 
  • Seas0nPass 
  • Firmware(ipsw) 
  • iREB 
  • iFaith 
  • Putty


The process was supposed to be pretty straight forward, I downloaded the latest Greenpois0n jail break utility and thought I would be on my way. Don't bother following this as I only mention it because this is what I first tried and wanted to share my results.

I wanted to jail break mainly because with the stock ATV you have to play everything in Apple's approved formats, I like to keep my movies in AVI (mostly xvid) and don't want to have to convert them to view them through the ATV.

First thing to do when jail breaking an ATV is to back up the SHSH Blobs, I used a utility called iFaith. This will allow you to create signed ipsws (with iFaith) and return to previous versions of ios software.

Backing up SHSH Blobs - Open iFaith and select the Dump SHSH Blobs


Place these files in a secure location, they will be needed if you ever want to downgrade you ipsw version


So I started on the jail break, first thing I realized is that getting the ATV into DFU mode (the mode it has to be in for applying a jail break) is a little hard at first. Following the on screen instructions in Greenpois0n failed more times than it succeeded. Finally I got it and started with the jail break...


Now getting the ATV in DFU mode holding in the two small buttons on the remote


Ready...


Once the ATV gets into DFU mode the bottom left button will say jail break.


Failure!

So after clicking jail break and watching as the progress bars work their magic it would finish saying that the jail break was applied successfully. I disconnect the ATV and connected it to my TV and nothing had changed from the out of the box screens. I tried this several times even using earlier versions of GP and even on another computer, all had the same result. 

So my next Google search leads me to another utility called Seas0nPass


Seas0nPass works a little different, instead of modifying your existing ipsw (software) it actually will either automatically download the latest version of ios that is jail breakable or you can hold the shift key down and select an ipsw version that you have previously downloaded. Unlike Greenpois0n, Seas0nPass will only jailbreak your ATV so that you can install software to it, it will not install any software for you. Greenpois0n would have been nice because it gives you the option of inject software from the ATV menu. 

So I downloaded the latest version of ios that I knew could be jail broken which was AppleTV2,1_4.3_8F202_Restore.ipsw, and I proceeded to let Seas0nPass modify it.


Once Seas0nPass has modified the ipsw you can either let it automatically launch iTunes and install the custom firmware for you or you can manually do this. I tried both methods with no success, for the most part I kept getting the 3194 error which means that iTunes realizes this is not a correct ipsw that you can install on your device. I also saw error codes 21, 1600 and a few others. I struggled with these errors for hours trying every utility in every order and could not get past these errors.

FAILURE!

In the end there were three key things that got me past all of the errors, the first was to rename the custom ipsw that Seas0nPass creates, basically remove the SP from the filename so that it looks like the stock file name for that particular version of ios. 

The second was to get a utility called TinyUmbrella


Select the Advanced Tab and ensure that your checkboxes match mine...


Once your checkboxes are set to match mine from the General tab you will be able to start the TSS server, this will need to be running when you perform the last step of importing the ipsw into iTunes. (Note) that each time you attempt this I would recommend stopping and starting the TSS server as it seemed to have issues if I didnt do this.

The third step was to use a seperate utility called iREB to put the ATV into DFU mode, apparently it does matter how you do this and it can help get past some of the errors when restoring an ipsw in iTunes.

Launch iREB and select Apple TV 2


Follow the instructions to get the ATV into DFU mode


Now launch iTunes and you should immediately see the ATV screen with the restore button, hold down the shift key and select Restore. Browse to the modified ipsw file that Seas0nPass created, make sure you have removed the SP out of the title of the file and let iTunes restore the ipsw. 


When the installation is complete plug the Apple TV into a television and you should see a new menu item in the top navigation bar. 


Install Software

Now that your ATV is jailbroken, we’re going to install third-party software such as XBMC. First, we have to find out what IP address your ATV was assigned by your router. From the ATV homescreen navigate to the Settings menu. Select General and then Network. Next to IP Address is your ATV's IP address.


Download Putty for Windows and launch. Type in your ATV's IP address in the Host Name (or IP address) field. Click Open and you will be prompted to log in as a username. Type “root” as the username and type “alpine” for the password.

Now type the following commands right after each other, press Enter after each line:

echo "deb http://apt.awkwardtv.org ./" > /etc/apt/sources.list.d/awkwardtv.list
apt-get update
apt-get install com.nito.nitoTV
killall Lowtide
reboot

After you run the third command, you will notice it will ask if you want to continue. Type “y” and hit Enter. 


When your ATV restarts you will see that you installed nitoTV, which acts like Cydia on a jailbroken iPhone, nitoTV is a package management system that allows users to download packages. From the homescreen, select nitoTV and open it. You’ll see a list of packages that you can install. I suggest installing XBMC-ATV2, updateBeGone and Overflow at a minimum, you can highlight these and it will give you a description of what each is.

Enjoy!


Links

Greenpois0n -  http://greenpois0n.com/