The project will take several minutes to complete, once this process is complete type the following commands - one at a time from the Integrated Terminal command line.
Node Packages/Types (Install these individually)
- npm install jquery
--save
- npm install @types/jquery --save-dev
- npm install tether --save
- npm install @types/tether --save-dev
- npm install
bootstrap --save
- npm install @types/bootstrap --save-dev
- npm install
datatables.net --save
- npm install @types/datatables.net --save-dev
- npm install
datatables-select --save
- npm install @types/datatables.net-select --save
- npm install toastr
--save
- npm install @types/toastr
--save
Verify jquery was installed correctly by expanding the node_modules folder in the spfx folder structure and scrolling down to the jquery folder, inside this folder should be a dist folder and inside that folder should be the file that will be referenced in the config.json file jquery.min.js. The remainder of the downloaded packages can be verified using this same method.
Include Node Packages in solution
Now that all of the required node packages have been installed, alter the web part code to include these packages in the solution.
Modify config.json
Starting with Jquery add the following lines to the config.json file in the config folder - externals section. These two libraries will be bundled separately from the other libraries in the project.
{
  "entries": [
    {
      "entry": "./lib/webparts/spfx/SpfxWebPart.js",
      "manifest": "./src/webparts/spfx/SpfxWebPart.manifest.json",
      "outputPath": "./dist/spfx.bundle.js"
    }
  ],
  "externals": {
    "jquery": {
      "path": "node_modules/jquery/dist/jquery.min.js",
      "globalName": "jQuery"
    },
     "toastr": {
      "path": "node_modules/toastr/toastr.js",
      "globalName": "jQuery"
    }
   },
  "localizedResources": {
    "spfxStrings": "webparts/spfx/loc/{locale}.js"
  }
}
There are multiple methods for including JavaScript libraries and css into a SharePoint solution,
I'll demonstrate a couple of different ones. The first is to add the external library as a
non-bundled library by including an entry in the config.json externals shown above and then in the
SpfxWebPart.ts file adding the following entries.
In the project folder structure expand the src folder, expand the webparts folder, expand the spfx
folder. In the spfx folder select the SpfxWebPart.ts file and add the following lines to near the
top of the file.
import { SPComponentLoader } from '@microsoft/sp-loader';
import * as jQuery from 'jquery';
import * as toastr from 'toastr';
require('node_modules/tether/dist/js/tether.min.js');
require('node_modules/bootstrap/dist/js/bootstrap.min.js');
require('node_modules/datatables.net');
require('node_modules/datatables-select/dist/js/datatables.select.min.js');
SPComponentLoader.loadCss('https://cdnjs.cloudflare.com/ajax/libs/tether/1.4.0/css/tether.min.css');
SPComponentLoader.loadCss('https://cdnjs.cloudflare.com/ajax/libs/twitter-bootstrap/3.3.7/css/bootstrap.min.css');
SPComponentLoader.loadCss('https://cdn.datatables.net/1.10.13/css/jquery.dataTables.min.css');
SPComponentLoader.loadCss('https://cdnjs.cloudflare.com/ajax/libs/toastr.js/latest/toastr.min.css');
The first statement imports the SPComponentLoader which can be used to bring in javascript and css files from external sources.
The import statements above for jquery and toastr will bring in the files referenced in the config.json
externals section.
The second method for bringing in external JavaScript libraries is to use the require statement
used above and this will ensure the node modules that were pulled down earlier will be available
for use within the solution.
for both methods used above the css files will be referenced using the SPComponentLoader shown
above.
The entire SpfxWebPart.ts file will be shown here below
import { Version } from '@microsoft/sp-core-library';
import {
BaseClientSideWebPart,
IPropertyPaneConfiguration,
PropertyPaneTextField
} from '@microsoft/sp-webpart-base';
import { escape } from '@microsoft/sp-lodash-subset';
import { SPComponentLoader } from '@microsoft/sp-loader';
import styles from './Spfx.module.scss';
import * as strings from 'spfxStrings';
import { ISpfxWebPartProps } from './ISpfxWebPartProps';
import * as jQuery from 'jquery';
import * as toastr from 'toastr';
require('node_modules/tether/dist/js/tether.min.js');
require('node_modules/bootstrap/dist/js/bootstrap.min.js');
require('node_modules/datatables.net');
require('node_modules/datatables-select/dist/js/datatables.select.min.js');
SPComponentLoader.loadCss('https://cdnjs.cloudflare.com/ajax/libs/tether/1.4.0/css/tether.min.css');
SPComponentLoader.loadCss('https://cdnjs.cloudflare.com/ajax/libs/twitter-bootstrap/3.3.7/css/bootstrap.min.css');
SPComponentLoader.loadCss('https://cdn.datatables.net/1.10.13/css/jquery.dataTables.min.css');
SPComponentLoader.loadCss('https://cdnjs.cloudflare.com/ajax/libs/toastr.js/latest/toastr.min.css');
export default class SpfxWebPart extends BaseClientSideWebPart<ISpfxWebPartProps> {
public render(): void {
this.domElement.innerHTML = `
<div class="container">
<h1><span class="label label-primary">SPFX Grid Data Consumed via SharePoint Rest API</span></h1>
<div id="toolbar">
<button type="button" value="Files" class="btn btn-info" onclick="Javascript: location.href = '../Lists/SpfxFiles'"><span class='glyphicon glyphicon-upload'></span> File List</button>
<button type="button" class="btn btn-success addNewFile"><span class='glyphicon glyphicon-plus'></span> Add New File</button>
</div>
<p></p>
<div id="FilesPanel">
<table style="width: 100%;">
<tr>
<td>
<div id="FilesGrid" style="width: 100%"></div>
</td>
</tr>
</table>
</div>
<!-- Bootstrap Modal Dialog for new/edit files-->
<div class="modal fade" id="myModalNorm" tabindex="-1" role="dialog" aria-labelledby="myModalLabel" aria-hidden="true">
<div class="modal-dialog">
<div class="modal-content">
<!-- Modal Header -->
<div class="modal-header">
<button type="button" class="close" data-dismiss="modal">
<span aria-hidden="true">×</span>
<span class="sr-only">Close</span>
</button>
<h4 class="modal-title" id="myModalLabel">
Add New File
</h4>
</div>
<!-- Modal Body -->
<div class="modal-body" id="modalBody">
<form role="form" id="fileForm">
<div class="form-group">
<label>File Title</label>
<input class="form-control" id="fileTitle"/>
</div>
<div class="form-group">
<label>File Name</label>
<input class="form-control" id="fileName"/>
</div>
<div class="form-group">
<label>File Type</label>
<input class="form-control" id="fileType"/>
</div>
<div class="form-group">
<label>Team</label>
<input class="form-control" id="team"/>
</div>
<!-- hidden controls -->
<div style="display: none">
<input id="etag" />
<input id="fileId" />
</div>
</form>
<div class="modal-footer">
<button type="button" class="btn btn-danger" data-dismiss="modal" onclick='updateFormLabel();'>
Cancel
</button>
<button type="submit" class="btn btn-primary" id="fileFormSubmit">
Submit
</button>
</div>
</div>
</div>
</div>
</div>
</div>
<!-- Bootstrap Modal Dialog for delete files-->
<div class="modal fade" id="deleteFiles" tabindex="-1" role="dialog" aria-hidden="true">
<div class="modal-dialog">
<div class="modal-content">
<!-- Modal Header -->
<div class="modal-header">
<button type="button" class="close" data-dismiss="modal">
<span aria-hidden="true">×</span>
<span class="sr-only">Close</span>
</button>
<h4 class="modal-title" id="myModalLabel2">
Delete Confirmation
</h4>
</div>
<!-- Modal Body -->
<div class="modal-body" id="modalBody2">
<p>Are you sure you wish to delete this item?</p>
<form role="form" id="deleteForm">
<!-- hidden controls -->
<div style="display: none">
<input id="deleteId" />
</div>
</form>
<div class="modal-footer">
<button type="button" class="btn btn-danger" data-dismiss="modal" '>
Cancel
</button>
<button type="submit" class="btn btn-primary" id="deleteConfirmationSubmit">
Submit
</button>
</div>
</div>
</div>
</div>
`;
var RestUrl = "../_api/lists/getbytitle('SPFxFiles')/items";
$(document).ready(function () {
PopulateGrid();
$('#fileFormSubmit').click(function (e) {
//Check for edit or new and call update or add function
if ($('#myModalLabel').html() == 'Add New File') {
addFile($('#fileTitle').val(), $('#fileName').val(), $('#fileType').val(), $('#team').val());
} else {
UpdateFiles($('#fileId').val());
}
});
$('#deleteConfirmationSubmit').click(function (e) {
var restUrl = "../_api/web/lists/GetByTitle('SPFxFiles')/items(" + $('#deleteId').val() + ")";
jQuery.ajax({
url: restUrl,
type: "DELETE",
headers: {
Accept: "application/json;odata=verbose",
"X-RequestDigest": $("#__REQUESTDIGEST").val(),
"IF-MATCH": "*"
}
});
toastr.success("File Successfully Deleted.", "Success");
//PopulateGrid();
});
});
function PopulateGrid() {
//Clear datatables
$('#FilesGrid').empty();
//Get File list items
$.ajax({
url: RestUrl,
method: "GET",
headers: {
"accept": "application/json;odata=verbose"
},
success: function (data) {
if (data.d.results.length > 0) {
//construct HTML Table from the JSON Data
$('#FilesGrid').append(GenerateTableFromJson(data.d.results));
//Bind the HTML data with Jquery DataTable
var oTable = (<any>$('#FilesTable')).DataTable({
//control which datatable options available
dom: 'Bfrltip',
//add select functionality to datatable
select: true,
//adjust column widths
"columns": [
null,
null,
null,
null,
null,
{ "width": "8%" }
],
//remove sort icon from actions column
"aoColumnDefs": [
{ "bSortable": false, "aTargets": [5] }
]
});
} else {
$('#FilesGrid').append("<span>No Files Found.</span>");
}
},
error: function (data) {
$('#FilesGrid').append("<span>Error Retreiving Files. Error : " + JSON.stringify(data) + "</span>");
}
});
};
//Generate html table values
function GenerateTableFromJson(objArray) {
var tableContent =
'<table id="FilesTable" class="table table-striped table-bordered" cellspacing="0" width="100%">' +
'<thead><tr>' + '<th>ID</th>' + '<th>Title</th>' + '<th>FileName</th>' + '<th>FileType</th>' +
'<th>Team</th>' + '<th>Actions</th>' + '</tr></thead>';
for (var i = 0; i < objArray.length; i++) {
tableContent += '<tr>';
tableContent += '<td>' + objArray[i].Id + '</td>';
tableContent += '<td>' + objArray[i].Title + '</td>';
tableContent += '<td>' + objArray[i].SPFxFileName + '</td>';
tableContent += '<td>' + objArray[i].SPFxFileType + '</td>';
tableContent += '<td>' + objArray[i].SPFxTeam + '</td>';
tableContent += "<td><a id='" + objArray[i].Id + "' href='#' style='color: orange' class='confirmEditFileLink'>" +
"<i class='glyphicon glyphicon-pencil' title='Edit File'></i></a>  ";
tableContent += "<a id='" + objArray[i].Id + "' href='#' style='color: red' class='confirmDeleteFileLink'>" +
"<i class='glyphicon glyphicon-remove' title='Delete File'></i></a>  ";
tableContent += "<a id='" + objArray[i].Id + "' href='#' class='confirmListItemDetailsLink'>" +
"<i class='glyphicon glyphicon-cog' title='Link to List Item'></i></a></td>";
tableContent += '</tr>';
}
return tableContent;
};
// Edit button click event
$(document).on('click', '.confirmEditFileLink', function (e) {
e.preventDefault();
var id = this.id;
var requestUri = "../_api/web/lists/getByTitle('SPFxFiles')/items(" + id + ")";
$.ajax({
url: requestUri,
method: "GET",
contentType: "application/json;odata=verbose",
headers: { "accept": "application/json;odata=verbose" },
success: function (data) {
$('#fileTitle').val(data.d.Title);
$('#fileName').val(data.d.SPFxFileName);
$('#fileType').val(data.d.SPFxFileType);
$('#team').val(data.d.SPFxTeam);
$('#fileId').val(data.d.Id);
$('#myModalLabel').html('Edit File');
(<any>$('#myModalNorm')).modal('show');
$("#etag").val(data.d.__metadata.etag);
}
});
});
//Link to files list item
$(document).on('click', '.confirmListItemDetailsLink', function (e) {
e.preventDefault();
var id = this.id;
var requestUri = "../Lists/SPFxFiles/DispForm.aspx?ID=" + id;
window.location.href = requestUri;
});
// Delete button click event
$(document).on('click', '.confirmDeleteFileLink', function (e) {
e.preventDefault();
var id = this.id;
$('#deleteId').val(id);
(<any>$('#deleteFiles')).modal({
show: true
})
});
//Update Model Label
function updateFormLabel() {
$('#myModalLabel').html('Add New File');
};
//Populate then display modal dialog for add file button clicked
$(document).on('click', '.addNewFile', function (e) {
$('#myModalLabel').html('Add New File');
$('#fileTitle').val('');
$('#fileName').val('');
$('#fileType').val('');
$('#team').val('');
$('#fileId').val('');
(<any>$('#myModalNorm')).modal('show');
});
//Edit file function
function UpdateFiles(id) {
var fileTitle = $("#fileTitle").val();
var fileName = $("#fileName").val();
var fileType = $("#fileType").val();
var team = $("#team").val();
var eTag = $("#etag").val();
var requestUri = "../_api/web/lists/getByTitle('SPFxFiles')/items(" + id + ")";
var requestHeaders = {
"accept": "application/json;odata=verbose",
"X-HTTP-Method": "MERGE",
"X-RequestDigest": $('#__REQUESTDIGEST').val(),
"If-Match": eTag
}
var fileData = {
__metadata: { "type": "SP.Data.SPFxFilesListItem" },
Title: fileTitle,
SPFxFileName: fileName,
SPFxFileType: fileType,
SPFxTeam: team
};
var requestBody = JSON.stringify(fileData);
return $.ajax({
url: requestUri,
type: "POST",
contentType: "application/json;odata=verbose",
headers: requestHeaders,
data: requestBody
});
}
//Add File function
var addFile = function (fileTitle, fileName, fileType, team) {
var requestUri = "../_api/web/lists/getByTitle('SPFxFiles')/items";
var requestHeaders = {
"accept": "application/json;odata=verbose",
"content-type": "application/json;odata=verbose",
"X-RequestDigest": $('#__REQUESTDIGEST').val()
}
var fileData = {
__metadata: { "type": "SP.Data.SPFxFilesListItem" },
Title: fileTitle,
SPFxFileName: fileName,
SPFxFileType: fileType,
SPFxTeam: team
};
var requestBody = JSON.stringify(fileData);
return $.ajax({
url: requestUri,
type: "POST",
headers: requestHeaders,
data: requestBody
});
};
}
protected get dataVersion(): Version {
return Version.parse('1.0');
}
protected getPropertyPaneConfiguration(): IPropertyPaneConfiguration {
return {
pages: [
{
header: {
description: strings.PropertyPaneDescription
},
groups: [
{
groupName: strings.BasicGroupName,
groupFields: [
PropertyPaneTextField('description', {
label: strings.DescriptionFieldLabel
})
]
}
]
}
]
};
}
}
Eventually I will split out the javascript code into a separate module that I reference so it will clean up this file greatly but for now I'm just trying to get the demonstration working and published.
Adding the SharePoint List
For this demonstration to work, a custom list needs to be provisioned with some default data so the jquery datatables grid will render some content.
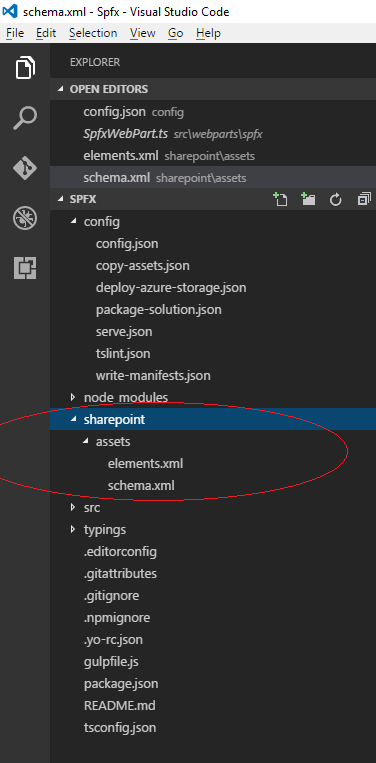
In Visual Studio Code from the project explorer right click below the last file name displayed and select New Folder.
Name the folder sharepoint. Right click on the sharepoint folder and create another folder called assets. Right click on the assets folder and select new file, name the first file elements.xml and the second file schema.xml.
Open the
Elements.xml and paste the following code into the file, this code defines 3 custom field types a content type that groups these field types and a list instance. The list instance that will be the actual instantiation of our list will include some default sample data shown in the <Data> node.
<?xml version="1.0" encoding="utf-8"?>
<Elements xmlns="http://schemas.microsoft.com/sharepoint/">

    <Field ID="{060E50AC-E9C1-4D3C-B1F9-DE0BCAC300F6}"
            Name="SPFxFileType"
            DisplayName="File Type"
            Type="Text"
            Required="FALSE"
            Group="SPFx Columns" />

    <Field ID="{943E7530-5E2B-4C02-8259-CCD93A9ECB18}"
            Name="SPFxFileName"
            DisplayName="File Name"
            Type="Text"
            Required="FALSE"
            Group="SPFx Columns">
    </Field>
    <Field ID="{943E7530-5E2B-4C02-8259-CCD93A9ECB19}"
            Name="SPFxTeam"
            DisplayName="Team"
            Type="Text"
            Required="FALSE"
            Group="SPFx Columns">
    </Field>

    <ContentType ID="0x010042D0C1C200A14B6887742B6344675C8B"
            Name="SpfxFiles"
            Group="SPFx Content Types"
            Description="Sample content types from web part solution">
        <FieldRefs>
            <FieldRef ID="{060E50AC-E9C1-4D3C-B1F9-DE0BCAC300F6}" />
            <FieldRef ID="{943E7530-5E2B-4C02-8259-CCD93A9ECB18}" />
            <FieldRef ID="{943E7530-5E2B-4C02-8259-CCD93A9ECB19}" />
        </FieldRefs>
    </ContentType>

    <ListInstance
            CustomSchema="schema.xml"
            FeatureId="00bfea71-de22-43b2-a848-c05709900100"
            Title="SPFxFiles"
            Description="SPFx Files"
            TemplateType="100"
            Url="Lists/SPFxFiles">
            <Data>
                <Rows>
                    <Row>
                    <Field Name="Title">Autoexec</Field>
                    <Field Name="SPFxFileName">Autoexec</Field>
                    <Field Name="SPFxFileType">bat</Field>
                    <Field Name="SPFxTeam">Microsoft</Field>
                    </Row>
                    <Row>
                    <Field Name="Title">Config</Field>
                    <Field Name="SPFxFileName">Config</Field>
                    <Field Name="SPFxFileType">sys</Field>
                    <Field Name="SPFxTeam">EMC</Field>
                    </Row>
                    <Row>
                    <Field Name="Title">Hosts</Field>
                    <Field Name="SPFxFileName">Hosts</Field>
                    <Field Name="SPFxFileType">exe</Field>
                    <Field Name="SPFxTeam">Dell</Field>
                    </Row>
                    <Row>
                    <Field Name="Title">Bootstrap</Field>
                    <Field Name="SPFxFileName">Bootstrap</Field>
                    <Field Name="SPFxFileType">js</Field>
                    <Field Name="SPFxTeam">EMC</Field>
                    </Row>
                    <Row>
                    <Field Name="Title">Startup</Field>
                    <Field Name="SPFxFileName">Startup</Field>
                    <Field Name="SPFxFileType">css</Field>
                    <Field Name="SPFxTeam">Dell</Field>
                    </Row>
                </Rows>
            </Data>
    </ListInstance>
</Elements>
Open the
Schema.xml file and paste the following code into the file. The schema file will define the custom list including the content type defined above and the fields to be included in the default view.
<List xmlns:ows="Microsoft SharePoint" Title="Basic List" EnableContentTypes="TRUE"
FolderCreation="FALSE" Direction="$Resources:Direction;" Url="Lists/Basic List"
BaseType="0" xmlns="http://schemas.microsoft.com/sharepoint/">
  <MetaData>
    <ContentTypes>
      <ContentTypeRef ID="0x010042D0C1C200A14B6887742B6344675C8B" />
    </ContentTypes>
    <Fields></Fields>
    <Views>
      <View BaseViewID="1" Type="HTML" WebPartZoneID="Main"
DisplayName="$Resources:core,objectiv_schema_mwsidcamlidC24;"
DefaultView="TRUE" MobileView="TRUE" MobileDefaultView="TRUE"
SetupPath="pages\viewpage.aspx"
      ImageUrl="/_layouhttps://devofficecdn.azureedge.net/sharepointdocumentation/images/generic.png" Url="AllItems.aspx">
        <XslLink Default="TRUE">main.xsl</XslLink>
        <JSLink>clienttemplates.js</JSLink>
        <RowLimit Paged="TRUE">30</RowLimit>
        <Toolbar Type="Standard" />
        <ViewFields>
          <FieldRef Name="LinkTitle"></FieldRef>
          <FieldRef Name="SPFxFileName"></FieldRef>
          <FieldRef Name="SPFxFileType"></FieldRef>
          <FieldRef Name="SPFxTeam"></FieldRef>
        </ViewFields>
        <Query>
          <OrderBy>
            <FieldRef Name="ID" />
          </OrderBy>
        </Query>
      </View>
    </Views>
    <Forms>
      <Form Type="DisplayForm" Url="DispForm.aspx" SetupPath="pages\form.aspx" WebPartZoneID="Main" />
      <Form Type="EditForm" Url="EditForm.aspx" SetupPath="pages\form.aspx" WebPartZoneID="Main" />
      <Form Type="NewForm" Url="NewForm.aspx" SetupPath="pages\form.aspx" WebPartZoneID="Main" />
    </Forms>
  </MetaData>
</List>
In the config folder open the
package-solution.json file and paste the following code in the file. The package-solution file defines the solution and the feature that will be used to provision the custom list defined above. In the paths node the output directory is defined where the packed solution (.sppkg) file will be outputted.
{
  "solution": {
    "name": "spfx-client-side-solution",
    "id": "08244525-0fcd-4651-bef4-41aedba1dc47",
    "version": "1.0.0.0",
     "features": [{
      "title": "spfx-2-client-side-solution",
      "description": "spfx-2-client-side-solution",
      "id": "523fe887-ced5-4036-b564-8dad5c6c6e25",
      "version": "1.0.0.0",
      "assets": {
        "elementManifests": [
          "elements.xml"
        ],
        "elementFiles":[
          "schema.xml"
        ]
      }
    }]
  },
  "paths": {
    "zippedPackage": "solution/spfx.sppkg"
  }
}
Package the solution
Before packaging the solution select the Save All button, notice in the upper left corner the file icon with a 3 indicates there are 3 files that have been modified but not saved.
From the Integrated Terminal window type Gulp bundle
From the Integrated Terminal window type Gulp package-solution
Note - look for any red text when these commands are executed that indicate errors and ensure that Gulp bundle is executed before Gulp package-solution because Gulp bundle creates the dist folder with the bundle.js and other files that Gulp package-solution require.
From the Integrated Terminal window type Gulp serve. This command will start the local web site that will be accessed by SharePoint Online to render the web part. Note - If Gulp serve is not running before the web part is added to the page or viewed an error will be displayed.
Deploy Web Part to SharePoint Online
Because this solution relies on a SharePoint hosted list, running the web part in the local SharePoint Workbench tool will not work. I may change this later to add mock SharePoint list data when running the solution locally but for now I'll just deploy the solution to SharePoint Online.
Now that the Gulp package-solution command has been executed a sppkg file will be created in the sharepoint | solution directory.
For this demonstration ensure you have an application catalog site created in SharePoint Online and navigate to that site and select Apps for SharePoint
Drag and drop the spfx.sppkg file into the Apps for SharePoint library. Select Deploy to trust the solution and deploy it into SharePoint.
Verify the solution displays that the app package is valid and it is deployed
Launch a separate browser session or tab and access your SharePoint Online Developer site. From the top toolbar select the gear icon and Add an App.
Select From Your Organization to filter the list of apps and select
spfx-client-side-solution.
The Site Contents page will be displayed and the spfx-client-side-solution will display and "We're adding your app" message. This will take a few minutes to complete.
Once the "We're adding your app" message disappears the app installation is complete, refresh the page and if the list is deployed successfully a SPFxfiles list will be included in the site contents. Notice that under the list title 5 items is displayed, this verifies that the data specified in the list definition was successfully provisioned.
Go back to the home page of the developer site and select the gear icon | Edit Page. Select the Insert Tab | Web Part | Under Development Category | spfx | Add.
The web part should be correctly displayed on the page, select Save.
Test the Web Part
Select the Add New File Button, fill out fields and select Submit
Select the pencil (Edit) icon on the newly added item in the grid, alter one of the fields and select Submit.
Select the X (Delete) icon on the newly added item in the grid, a confirmation dialog will appear, select Submit to delete the item from the list. The item should be removed from the list.
A File Successfully Deleted Toast will be displayed in the upper right corner.
This completes the SPFX Solution demonstration.
Please take a look at my follow up post
Here for instructions on hosting solution files via a CDN from a SharePoint Online document library. With this in place you will no longer need to run Gulp serve to correctly view the web part.