
Create the Visual Studio Project for the Workflow Solution
Select New Project | Visual C# | .Net Framework 3.5 | Empty Sharepoint Project

Add a new item to the project
Right click on the project name and select Add | New Item - Select C# | Sharepoint 2010 | Sequential Workflow
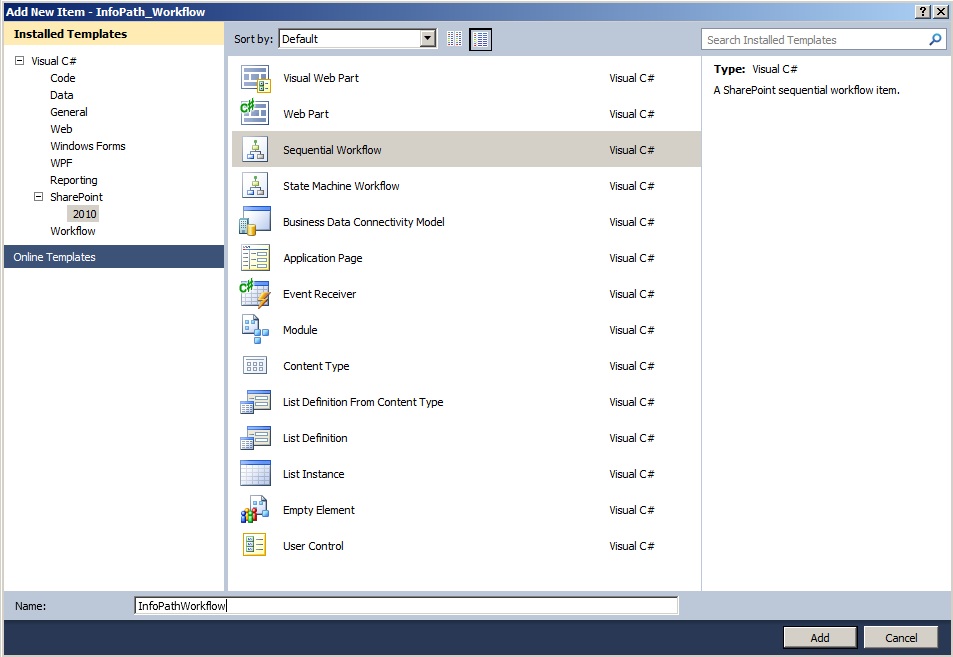
The Sharepoint Customization Wizard dialog will open, select a name for the new workflow InfoPath_Workflow, Select List Workflow

Note: The site you selected must have a task and workflow history list available for the new workflow or you will receive the following error message. This might occur if you used the blank site template to create the new site.

Select the Sharepoint lists to associate the workflow with

Ensure the workflow starts automatically when a new item is created checkbox is selected and click finish

The workflow designer surface will open in Visual Studio

Select View Toolbox and pin the Toolbox open. Expand the Windows Workflow V3.0 Node
Drag a While Control into the line under the onWorkflowActivated1 shape
Drag a Code Control onto the line under the whileActivity1 shape
Expand the Sharepoint Workflow Node
Drag a OnWorkflowItemChanged activity onto the text Drop and Activity Here inside the whileActivity1 shape

Note: Workflows are stored in a gallery at the Site Collection level so the scope will be Site.
Configure the Workflow Feature
When I added the Sequential Workflow to the project a Sharepoint Feature was added, I'll now configure this Feature.

I'll start by expanding the features folder and renaming the feature to InfoPathWorkflow. Next I'll double click the Feature name to open the Feature properties.

I'll change the Feature title in the Title textbox and ensure the Feature scope is set to Site. I'll also verify the the InfoPathWorkflow is listed in the Items in the Feature control.
Verify/Validate the Package
In the Solution Explorer I'll double click on the Package folder.

This will bring up the properties for the package, I'll rename the package and ensure the InfoPathWorkflow is in the Items in the Package control. Next I'll Validate the package and sure there are no warnings or errors with the deployment package.
Select View | Other Windows | Package Explorer

Right click on the package and select Validate

You should see a successful validation in the output window
This completes part 2, in part 3 I'll add the custom code to log any exceptions, allow the custom workflow to start and complete when specific conditions are met and create a new site collection.
No comments:
Post a Comment